Description:-
Dynamics
365 for Operations (formerly Dynamics AX) has a fresh and intuitive user
interface that can be customised to fit your needs. Here are 15 simple but
useful tips to help you make the most of your Dynamics 365 user experience.
Contents
1 - Add custom dashboard banner
2 - Personalise default dashboard
3 - Pin tile to default dashboard
4 - Pin list, project, etc. to default dashboard
5 - Pin NavPane and ActionPane
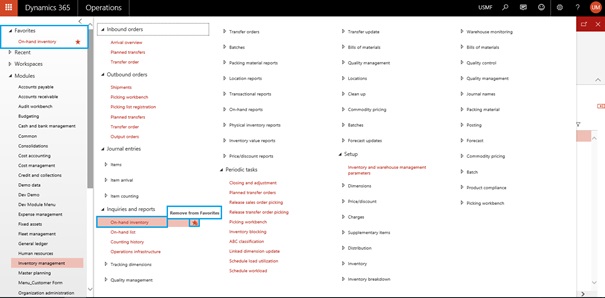
6 - Save favourites for quick access
7 - Default dashboard options: Essentials dashboard
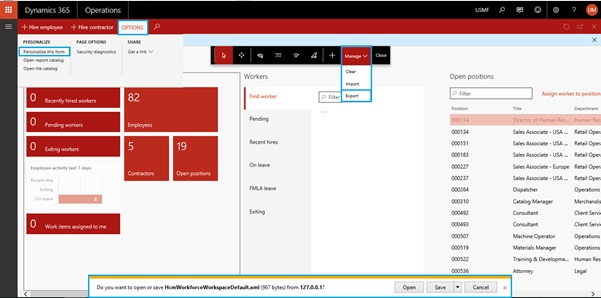
8 - Personalisation bar – Manage function
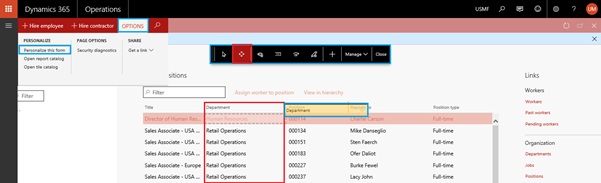
9 - Personalise grids
10 - Mouse over links for pop-up info boxes
11 - Peek behind a dialogue/slider
12 - Work in several windows at the same time
13 - Use the Action search bar
14 - Fast Tabs
15 - Fact Boxes
1 - Add custom dashboard banner
Organization administration > Organizations > Legal entities > Dashboard image:

Now click on EDIT button and change Dashboard company image type “banner”, after that click on change and upload you image. Please note that optimal resolution for a banner image is 1920 x 281 pixels and optimal width for a logo image is 350 pixels.

Now refresh the operation and you will see a new banner on your D365.

2 - Personalise default dashboard


3 - Pin tile to default dashboard
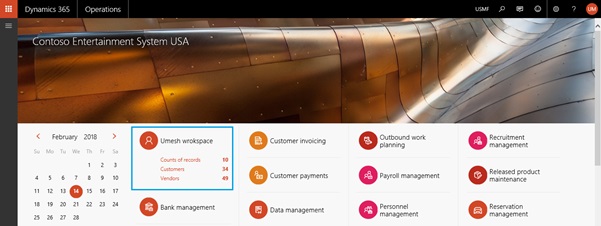
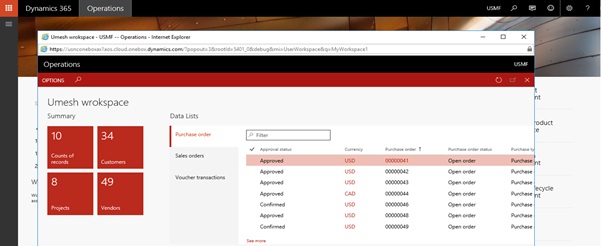
Now back to all workspace. Your workspace look like below image.
4 - Pin list, project, etc. to default dashboard
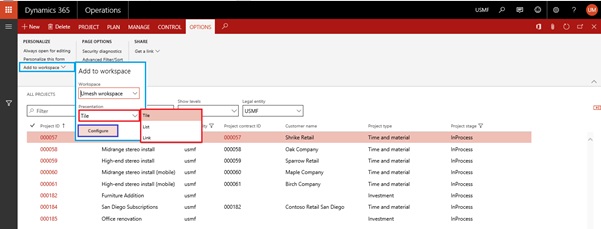
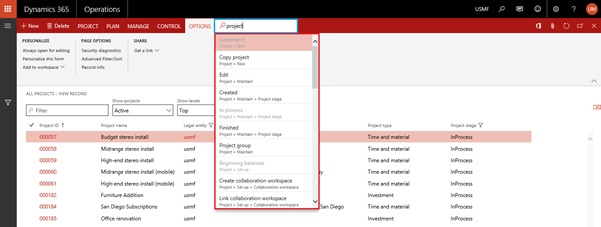
Filter list as necessary or open a project.
Select OPTIONS > Add to workspace.
Click Configure. Enter name for tile.
Deselect count on tile if not necessary. Return to Workspace and refresh.
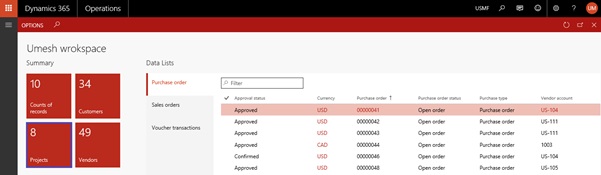
Now go to workspace and it will look like below image.
5 - Pin NavPane and ActionPane
ActionPane pin

NavPane pin

6 - Save favourites for quick access
Click star to save as favourite
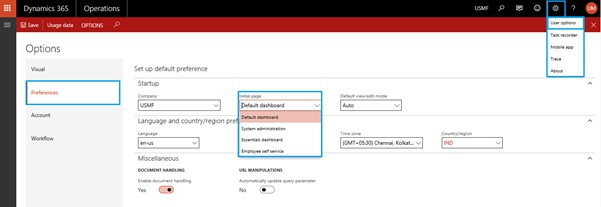
7 - Default dashboard options: Essentials dashboard
8 - Personalisation bar – Manage function
9 - Personalise grids

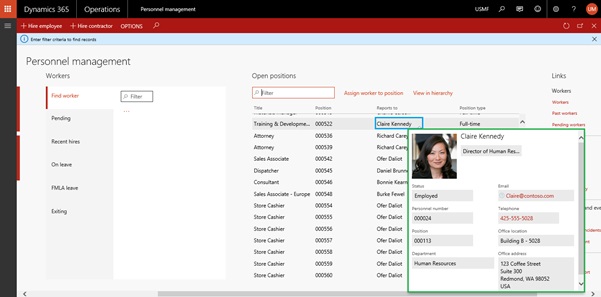
10 - Mouse over links for pop-up info boxes
Throughout the UI there are helpful pop-up info
boxes available by hovering the cursor over links.
11 - Peek behind a dialogue/slider
Click CTRL+
mouse left click and hold outside the slider to see behind.
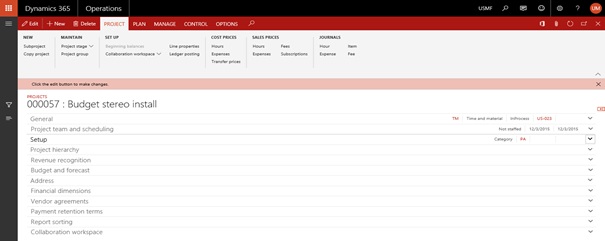
12 - Work in several windows at the same time
To work in more than one window simultaneously,
use the window pop-out icon. The original page will reload the previous page.
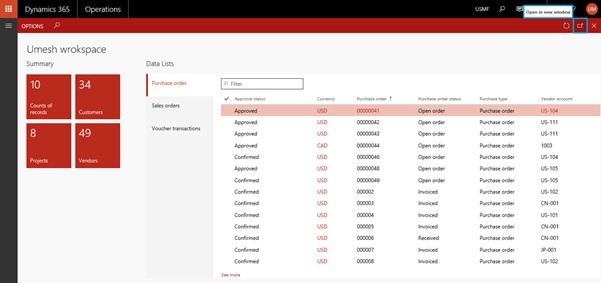
After click look like below image.
13 - Use the Action search bar
For quick access to Actions, use the Action
search bar ( hot key: Alt
+ Q or Ctrl + ‘ ).
Start typing the name of the desired Action and select in list.
14 - Fast Tabs
Data in Fast Tabs is not loaded until the tabs
are expanded. If not used often, leave in collapsed state as it may improve
performance.
15 - Fact Boxes
Data in Fact Boxes is not loaded until the
sections are expanded. If not used often, leave in collapsed state as it may
improve performance.

2 - Personalise default dashboard
3 - Pin tile to default dashboard
4 - Pin list, project, etc. to default dashboard
5 - Pin NavPane and ActionPane
6 - Save favourites for quick access
7 - Default dashboard options: Essentials dashboard
8 - Personalisation bar – Manage function
9 - Personalise grids
10 - Mouse over links for pop-up info boxes
11 - Peek behind a dialogue/slider
12 - Work in several windows at the same time
13 - Use the Action search bar
14 - Fast Tabs
15 - Fact Boxes
1 - Add custom dashboard banner
Organization administration > Organizations > Legal entities > Dashboard image:
Now click on EDIT button and change Dashboard company image type “banner”, after that click on change and upload you image. Please note that optimal resolution for a banner image is 1920 x 281 pixels and optimal width for a logo image is 350 pixels.
Now refresh the operation and you will see a new banner on your D365.
2 - Personalise default dashboard
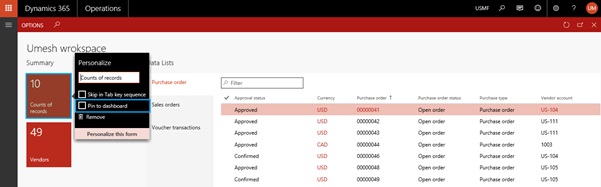
- Right-click on any Workspace.
- Click Personalise.
- Click Personalise this form.
- Use Personalisation bar to drag and drop or hide Workspaces.
3 - Pin tile to default dashboard
- Open desired Workspace.
- Right-click on a tile.
- Select Pin to dashboard.
Now back to all workspace. Your workspace look like below image.
4 - Pin list, project, etc. to default dashboard
Now go to workspace and it will look like below image.
5 - Pin NavPane and ActionPane
NavPane pin
6 - Save favourites for quick access
7 - Default dashboard options: Essentials dashboard
- Click main settings icon.
- Click User Options.
- Click Preferences.
- Select Initial page > Essentials dashboard.
8 - Personalisation bar – Manage function
- Choose OPTIONS > Personalise this form
- Click Manage
- Export all your personalisation into an XML file or Import a file
- Clear and refresh will reset Workspace to default state, apart from grids
9 - Personalise grids
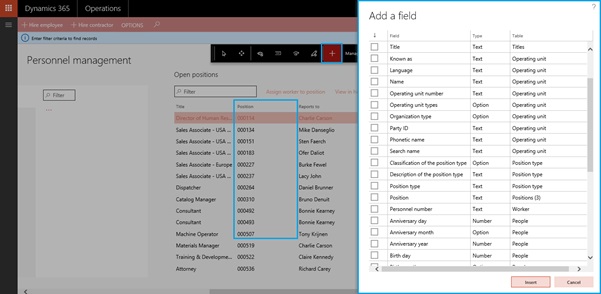
- Choose OPTIONS > Personalise this form
- Select Move or Hide function
- Click on column header to hide column
- Click on Add function
- Click on any column header (or filter) to bring up list of fields (or filters) to add
10 - Mouse over links for pop-up info boxes
11 - Peek behind a dialogue/slider
12 - Work in several windows at the same time
After click look like below image.
13 - Use the Action search bar
14 - Fast Tabs
15 - Fact Boxes

Thanks for comments.....