Description:-
In this article we will see about how to read Xml File in Datatable and bind into datalist in dotnet. Here I have created student xml file and bind into datalist. Here notice that XML file should be physical location t means in your project so we can read it using server method.
Design.aspx:-
Default.aspx.cs:-
XML File:-
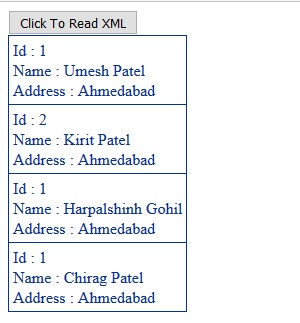
Output:-

In this article we will see about how to read Xml File in Datatable and bind into datalist in dotnet. Here I have created student xml file and bind into datalist. Here notice that XML file should be physical location t means in your project so we can read it using server method.
Design.aspx:-
    <div>
        <div>
            <asp:Button ID="Button1" runat="server" Text="Click To Read XML" OnClick="Button1_Click" />
        </div>
        <asp:DataList ID="DataList1" runat="server" BackColor="White" BorderColor="#3366CC"
            BorderStyle="None" BorderWidth="1px" CellPadding="4" GridLines="Both">
            <ItemStyle BackColor="White" ForeColor="#003399" />
            <ItemTemplate>
                Id :
                <asp:Label ID="Label1" runat="server" Text='<%# Eval("id") %>'></asp:Label><br />
                Name :
                <asp:Label ID="Label2" runat="server" Text='<%# Eval("name") %>'></asp:Label><br />
                Address :
                <asp:Label ID="Label3" runat="server" Text='<%# Eval("address") %>'></asp:Label>
            </ItemTemplate>
        </asp:DataList>
    </div>
Default.aspx.cs:-
        public void Button1_Click(object sender, EventArgs e)
        {
            DataTable objDataTable = new DataTable();
            string filepathe = @"XMLFile\XMLFile1.xml";
            objDataTable = ReadXMLFile1(filepathe);
            DataList1.DataSource = objDataTable;
            DataList1.DataBind();
        }

        public DataTable ReadXMLFile1(string filePath)
        {
            DataSet objds = new DataSet();
            objds.ReadXml(Server.MapPath(filePath));
            return objds.Tables[0];
        }
XML File:-
<students>
  <student>
    <id>1</id>
    <name>Umesh Patel</name>
    <address>Ahmedabad</address>
  </student>
  <student>
    <id>2</id>
    <name>Kirit Patel</name>
    <address>Ahmedabad</address>
  </student>
  <student>
    <id>1</id>
    <name>Harpalshinh Gohil</name>
    <address>Ahmedabad</address>
  </student>
  <student>
    <id>1</id>
    <name>Chirag Patel</name>
    <address>Ahmedabad</address>
  </student>
</students>
Output:-